Replacement Windows
 The new window is anchored to the old window frame against the exterior or blind stop, larger interior stops (must be purchased) are reinstalled to complete the installation.
 In order to have a successful installation, it is important to accurately measure for the new vinyl replacement window and specify the appropriate size.
Properly measured and ordered, the new window will fit perfectly and provide an installation that will give years of satisfactory performance.
 BEFORE YOU START
Read these instructions carefully and identify all the parts and tools used during the installation. Most work can be done from inside the house. Double check the opening and your new window size to be sure it will fit before removing the old window components. Some windows are shipped with bands around the middle of the window or have some other way to keep the unit square. Do not remove these until the unit is in the opening secure.
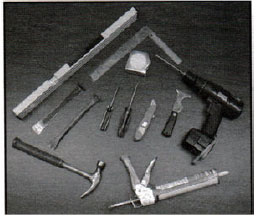 TOOLS YOU WILL NEED
Today's vinyl replacement windows need only simple hand tools for installation. They are: tape measure, razor knife, caulking gun, caulk, flathead Screwdriver, Phillips head screwdriver, flat bar, pry bar, level, square, hammer, drill.
Installation Tips for Vinyl Replacement Windows
 OTHER CONSIDERATIONS
When replacing an old window with a vinyl replacement window you will no longer need storm windows or separate screens. If there are screens or storms mounted to the outside of the house, it might be better if they are removed. This will give you the opportunity to thoroughly clean the opening and seal or paint any problem areas.
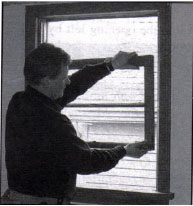
REMOVE THE OLD WINDOW
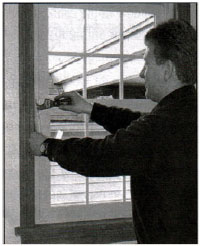
1). Remove inside stops with a flat bare and save them for later use, being careful not to break them.
2). Any cords, weights, or spring balances can be removed so that the old bottom wood sash can be removed. Remove any pulleys.
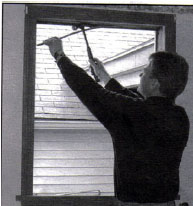
3). Pry out the top parting stop. Pliers can usually remove most stops or use the flat blade screw driver to pry the stop loose.
4). Pry out the side parting stops. For stops that are heavily painted or stuck, you can use the broad chisel to shear off the part of the stop that protrudes in the jamb.
5). Once the parting stops are out, the upper sash can be easily removed from the outer track.
6). If the old window has a preformed aluminum track, there will be no wood parting stop on the sided, but there will be one on the top. Remove the top parting stop then remove the staples holding the preformed track. There's also a mall aluminum block on the top and bottom of the aluminum tack. If must be removed.
 PREPARE THE OPENING
1). Clean the opening of any debris. Cover any holes made by the weight pulley. Remove any old screen hooks or other screws or fasteners. If there are holes left by the old weights and cords, fill the holes with fiberglass insulation and cover them.
2). Install a wood extender, aluminum capping or caulk on the outer sill frame of the replacement window.
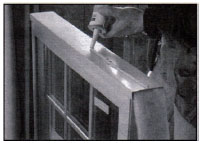
3). Caulk the inside edge of the blind stop along the top and down both sides. Make the caulk bead about 1/8". The bead should not lie against the window frame, just the blind stop. Place a bead of caulk on the top of the expander.
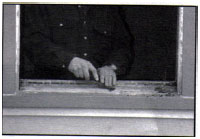
4). Lay fiberglass insulation on the sill of your old window.
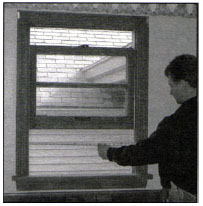
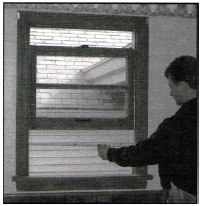
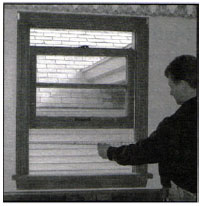
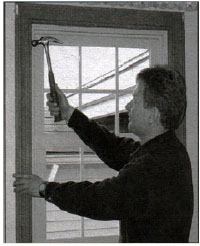
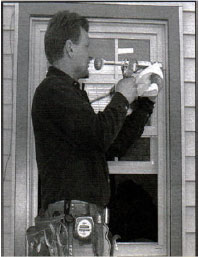
 INSTALL THE NEW WINDOW
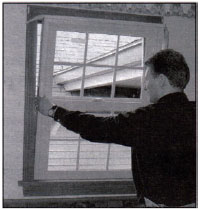
1). Place the window in the caulked opening by placing the inside lower edge on the outside sill tightly against the stool. Tilt the window into the opening.
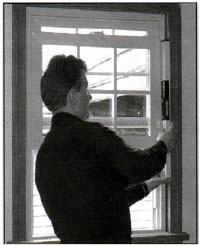
2). Check for plumb and level. It is important that the window remain square in the opening even if the opening itself is not square. Use flat shims to keep the window square.
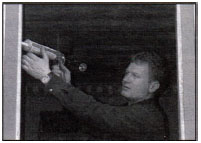
3). Place the shims behind the mounting screw holes. You will need to pre-drill two screw holes on each side at the top and bottom. The bottom screws will need to be recessed so they so not obstruct the movement of the balancers. To do this , drill through the frame with a drill bit the same size as the head of the screw to be used. Make sure you only drill through the first layer of the vinyl frame. Then with a smaller drill bit, drill through the second layer of vinyl frame, centered in the larger hole previously drilled. Tighten the screws lightly. Use flat shims, not taped shims. Tapered shims can twist the frame. NOTE: some windows have a jamb adjuster eliminates the need for shims in the center window. Adjust slightly. Once the frame is anchored lightly, check plum and level and square and tighten all the screws. Do not over tighten. Secure is sufficient. If you over tighten, the frame will twist and the window will not operate correctly.
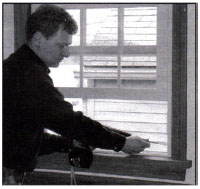
4). Push the head expander tight against the window. Caulk against the inside molding and window to seal any gap.
5). Replacing inside molding tightly against the window. Caulk against the inside molding and window to seal any gap.
6). Caulk outside where the sill angle meets the sill. Take care to seal any gap.
7). Caulk outside where the window meets the blind stop.
 FINISH THE JOB INSIDE AND OUTSIDE
To complete the installation and carefully seal against the weather, it is helpful to repair any damage to the outside of the house. Fill any old storm window holes or screen holes with putty.
If you should damage the interior stops when you remove them, or if old curtain rod brackets have been damaged, it may be wise to replace them. Most lumberyards have a selection of moldings that will match anything you might have.
HOW TO CHOOSE YOUR CAULK
The caulk you use is important. For interior use, if you are going to paint, it should be an acrylic-base sealant.
Exterior caulk should be a high performance elastomeric polymer sealant that closely matches the color of the vinyl replacement window. We offer OSI Quad exterior window caulk which matches the above criteria. Please call us to order at 866-589-9367.